<?xml version="1.0" encoding="utf-8"?><feed xmlns="http://www.w3.org/2005/Atom" ><generator uri="https://jekyllrb.com/" version="4.3.1">Jekyll</generator><link href="http://extrowerk.com/feed.xml" rel="self" type="application/atom+xml" /><link href="http://extrowerk.com/" rel="alternate" type="text/html" /><updated>2026-04-18T08:26:51+02:00</updated><id>http://extrowerk.com/feed.xml</id><title type="html">extrowerk</title><subtitle>My posts and thoughts</subtitle><author><name>extrowerk</name><email>fun.idea8268@fastmail.com</email></author><entry><title type="html">ZFS replication using ZRepl</title><link href="http://extrowerk.com/2026-03-03/ZFS-replacation-with-zrepl.html" rel="alternate" type="text/html" title="ZFS replication using ZRepl" /><published>2026-03-03T01:01:00+01:00</published><updated>2026-03-03T01:01:00+01:00</updated><id>http://extrowerk.com/2026-03-03/ZFS-replacation-with-zrepl</id><content type="html" xml:base="http://extrowerk.com/2026-03-03/ZFS-replacation-with-zrepl.html"><![CDATA[<p><img src="/img/2026-03-03_zrepl.jpg" alt="Secure storage" /></p>

<p>Till yesterday I used a simple USB disk as a ZFS backup pool. I had a moderately complex script started by cron at 6’o clok every morning to create a new snapshot about some vital information storing datasets and then <code class="language-plaintext highlighter-rouge">zfs send</code> and <code class="language-plaintext highlighter-rouge">zfs recv</code> it to the USB disk.
It wasn’t too elegant and it made me always a bit nervous knowing how volitaile USB disks are. My 2 cents: do not use USB disks for ZFS, but If you have to, then at least sure you have some proper redundancy with non-USB disks.</p>

<p>Nevertheless, this was the past, because I have just set up a OmniOS VM in the cloud for backup purposes.</p>

<p>It was a real adventure as the service provider doesn’t allows to upload a custom iso via the admin webui, but you can request it and they attach the specified iso to the VM. After rebooting the VM the machine booted into the … err … something unknown anti-spam appliance. It seems they messed up something, but then finally my VM booted into OmniOS. After a quick setup my instance was ready to receive the backups. I have already heard about <code class="language-plaintext highlighter-rouge">ZRepl</code> before, but I haven’t had any real exposure so I have decided to give it a try. There is a OmniOS guide, which was a big motivation, but at the end of the day, I did a custom install, which could be interesting for you aswell:</p>

<p>First: you have to deciede:</p>
<ul>
  <li>which datasets needs to be backed up</li>
  <li>which child-dataset should be excluded (if any)</li>
  <li>how often should it backed up</li>
  <li>how long should the backup stored</li>
  <li>etc.</li>
</ul>

<p>I got 20gigs of space on my VM, which is plenty, compared to the 8 gig USB drive I used so far.</p>

<p>To make my future life easier, I have created a file based zpool for easier migration. I got only one virtual disk, so I had no other choice. AFAIK: You shouldn’t store any sensitive date on rpool.</p>

<p>So I have followed the <a href="https://omnios.org/info/zrepl">OmniOS ZRepl guide</a> till the service configuration, but I have decided to go with <code class="language-plaintext highlighter-rouge">ssh</code> based authentication. This is not recommended, as this results in a lower bandwith, but this is also much easier to set up. Basically the client calls into the backup server and pushes their data via SSH. I only needed to set up some SSH keys and add them to the authorized_key on the VM side. Easy! (Comapred to rolling an own CA, for sure!)
As input I have alsu used this <a href="https://blog.lenny.ninja/posts/2022-01-25-zrepl-rsync-net.html">blogpost</a></p>

<p>Lets see how I did it:</p>

<p>I have added the public key of the machine I want to backup to the <code class="language-plaintext highlighter-rouge">.ssh/authorized_keys</code> on the backup server the following way:</p>

<div class="language-plaintext highlighter-rouge"><div class="highlight"><pre class="highlight"><code>command="zrepl stdinserver client1",restrict &lt;here comes the public key&gt;
</code></pre></div></div>

<p>Backup Server:</p>
<div class="language-plaintext highlighter-rouge"><div class="highlight"><pre class="highlight"><code>root@omnibackup:~# cat /etc/opt/ooce/zrepl/zrepl.yml
# zrepl main configuration file.
# For documentation, refer to https://zrepl.github.io/
#
global:
  logging:
    - type: "stdout"
      level:  "debug"
      format: "human"

jobs:
- name: sink
  type: sink
  serve:
      type: stdinserver
      client_identities:
      - "client_nas"
  root_fs: "storage/zrepl/sink"
  recv:
    placeholder:
      encryption: off # See https://zrepl.github.io/configuration/sendrecvoptions.html#placeholders

</code></pre></div></div>

<p>Client:</p>
<div class="language-plaintext highlighter-rouge"><div class="highlight"><pre class="highlight"><code>root@omnios:~# cat /etc/opt/ooce/zrepl/zrepl.yml
global:
  logging:

    - type: "stdout"
      level:  "debug"
      format: "human"
jobs:
- name: client_to_master
  type: push
  connect:
    host: "test.extrowerk.com"
    identity_file: /root/.ssh/backup-id_rsa
    port: 22
    type: ssh+stdinserver
    user: root
  filesystems: {
    "tank/storage/vault": true,
  }
  send:
    encrypted: true
  snapshotting:
    type: periodic
    prefix: zrepl_
    interval: 10m
  pruning:
    keep_sender:
    - type: not_replicated
    - type: last_n
      count: 10
    keep_receiver:
    - type: grid
      grid: 1x1h(keep=all) | 24x1h | 30x1d | 6x30d
      regex: "^zrepl_"
</code></pre></div></div>

<p>I had to set up a new RSA based SSH key, add the public part to the backup-server authorized_keys file (for the root user!). I have tried to use Ed25519 based keys, but zrepl didn’t liked it for some reason. In the mantime I have created a PR at omnios-extra for the zrepl-0.7.0, hopefully the issue have been already fixed in this version.</p>

<p>There was also a question about the encrypted datasets. In this specific case I have decided to not-allow to the backup-VM to decrypt the data, so I had to add the following lines to the config:</p>
<div class="language-plaintext highlighter-rouge"><div class="highlight"><pre class="highlight"><code>  recv:
    placeholder:
    encryption: off
</code></pre></div></div>

<p>The zrepl user guide says: <code class="language-plaintext highlighter-rouge">For encrypted-send-to-untrusted-receiver, the placeholder datasets need to be created with -o encryption=off</code>. This doesn’t mean the data gets transferred or stored unencrypted.</p>

<p>After setting everything up I ‘ve got:</p>

<div class="language-plaintext highlighter-rouge"><div class="highlight"><pre class="highlight"><code>FILTER                                                                                
┌────────────┐╔══════════════════════════════════════════════════════════════════════╗
│jobs        │║Job: client_to_master                                                 ║
│└──client_to│║Type: push                                                           ▒║
│            │║                                                                     ▒║
│            │║Replication:                                                         ▒║
│            │║   Attempt #1                                                        ▒║
│            │║   Status: done                                                      ▒║
│            │║   Last Run: 2026-03-03 21:02:50 +0100 CET (lasted 2s)               ▒║
│            │║     tank/storage/vault DONE (step 1/1, 1.6 KiB/624 B)               ▒║
│            │║                                                                     ▒║
│            │║Pruning Sender:                                                      ▒║
│            │║   Status: Done                                                      ▒║
│            │║   tank/storage/vault Completed  (destroy 1 of 11 snapshots)         ▒║
│            │║                                                                     ▒║
│            │║Pruning Receiver:                                                    ▒║
│            │║   Status: Done                                                      ▒║
│            │║   tank               skipped: filesystem is placeholder             ▒║
│            │║   tank/storage       skipped: filesystem is placeholder             ▒║
│            │║   tank/storage/vault Completed  (destroy 1 of 20 snapshots)         ▒║
│            │║                                                                     ▒║
└────────────┘╚══════════════════════════════════════════════════════════════════════╝
2026-03-03T21:09:00+01:00Q quit  &lt;TAB&gt; switch panes W wrap lines  Shift+M toggle nav
</code></pre></div></div>

<p>It seems the service runs just fine:</p>

<div class="language-plaintext highlighter-rouge"><div class="highlight"><pre class="highlight"><code>root@omnibackup:~# svcs -xv
</code></pre></div></div>

<p>The snapshots are encrypted:</p>

<div class="language-plaintext highlighter-rouge"><div class="highlight"><pre class="highlight"><code>root@omnibackup:~# zfs list -r -t snapshot -o name,encryption storage
NAME                                                                         ENCRYPTION
storage/zrepl/sink/client_nas/tank/storage/vault@zrepl_20260304_032248_000  aes-256-ccm
storage/zrepl/sink/client_nas/tank/storage/vault@zrepl_20260304_033248_000  aes-256-ccm
storage/zrepl/sink/client_nas/tank/storage/vault@zrepl_20260304_034248_000  aes-256-ccm
storage/zrepl/sink/client_nas/tank/storage/vault@zrepl_20260304_035248_000  aes-256-ccm
</code></pre></div></div>

<p>The backup host doesn’t posess the encryption key:</p>

<div class="language-plaintext highlighter-rouge"><div class="highlight"><pre class="highlight"><code>root@omnibackup:~# zfs get encryption,keylocation,keyformat,keystatus storage/zrepl/sink/client_nas/tank/storage/vault@zrepl_20260304_035248_000
NAME                                                                        PROPERTY     VALUE        SOURCE
storage/zrepl/sink/client_nas/tank/storage/vault@zrepl_20260304_035248_000  encryption   aes-256-ccm  -
storage/zrepl/sink/client_nas/tank/storage/vault@zrepl_20260304_035248_000  keylocation  -            -
storage/zrepl/sink/client_nas/tank/storage/vault@zrepl_20260304_035248_000  keyformat    -            -
storage/zrepl/sink/client_nas/tank/storage/vault@zrepl_20260304_035248_000  keystatus    unavailable  -
root@omnibackup:~# Hi and thanks for reading my blog!
</code></pre></div></div>

<p><a href="https://upload.wikimedia.org/wikipedia/commons/thumb/a/a0/ZFS_server_rear_27.jpg/960px-ZFS_server_rear_27.jpg">Pic</a></p>]]></content><author><name>z</name></author><summary type="html"><![CDATA[Till yesterday I used a simple USB disk as a ZFS backup pool. I had a moderately complex script started by cron at 6’o clok every morning to create a new snapshot about some vital information storing datasets and then zfs send and zfs recv it to the USB disk. It wasn’t too elegant and it made me always a bit nervous knowing how volitaile USB disks are. My 2 cents: do not use USB disks for ZFS, but If you have to, then at least sure you have some proper redundancy with non-USB disks. Nevertheless, this was the past, because I have just set up a OmniOS VM in the cloud for backup purposes. It was a real adventure as the service provider doesn’t allows to upload a custom iso via the admin webui, but you can request it and they attach the specified iso to the VM. After rebooting the VM the machine booted into the … err … something unknown anti-spam appliance. It seems they messed up something, but then finally my VM booted into OmniOS. After a quick setup my instance was ready to receive the backups. I have already heard about ZRepl before, but I haven’t had any real exposure so I have decided to give it a try. There is a OmniOS guide, which was a big motivation, but at the end of the day, I did a custom install, which could be interesting for you aswell: First: you have to deciede: which datasets needs to be backed up which child-dataset should be excluded (if any) how often should it backed up how long should the backup stored etc. I got 20gigs of space on my VM, which is plenty, compared to the 8 gig USB drive I used so far. To make my future life easier, I have created a file based zpool for easier migration. I got only one virtual disk, so I had no other choice. AFAIK: You shouldn’t store any sensitive date on rpool. So I have followed the OmniOS ZRepl guide till the service configuration, but I have decided to go with ssh based authentication. This is not recommended, as this results in a lower bandwith, but this is also much easier to set up. Basically the client calls into the backup server and pushes their data via SSH. I only needed to set up some SSH keys and add them to the authorized_key on the VM side. Easy! (Comapred to rolling an own CA, for sure!) As input I have alsu used this blogpost Lets see how I did it: I have added the public key of the machine I want to backup to the .ssh/authorized_keys on the backup server the following way: command="zrepl stdinserver client1",restrict &lt;here comes the public key&gt; Backup Server: root@omnibackup:~# cat /etc/opt/ooce/zrepl/zrepl.yml # zrepl main configuration file. # For documentation, refer to https://zrepl.github.io/ # global: logging: - type: "stdout" level: "debug" format: "human" jobs: - name: sink type: sink serve: type: stdinserver client_identities: - "client_nas" root_fs: "storage/zrepl/sink" recv: placeholder: encryption: off # See https://zrepl.github.io/configuration/sendrecvoptions.html#placeholders Client: root@omnios:~# cat /etc/opt/ooce/zrepl/zrepl.yml global: logging: - type: "stdout" level: "debug" format: "human" jobs: - name: client_to_master type: push connect: host: "test.extrowerk.com" identity_file: /root/.ssh/backup-id_rsa port: 22 type: ssh+stdinserver user: root filesystems: { "tank/storage/vault": true, } send: encrypted: true snapshotting: type: periodic prefix: zrepl_ interval: 10m pruning: keep_sender: - type: not_replicated - type: last_n count: 10 keep_receiver: - type: grid grid: 1x1h(keep=all) | 24x1h | 30x1d | 6x30d regex: "^zrepl_" I had to set up a new RSA based SSH key, add the public part to the backup-server authorized_keys file (for the root user!). I have tried to use Ed25519 based keys, but zrepl didn’t liked it for some reason. In the mantime I have created a PR at omnios-extra for the zrepl-0.7.0, hopefully the issue have been already fixed in this version. There was also a question about the encrypted datasets. In this specific case I have decided to not-allow to the backup-VM to decrypt the data, so I had to add the following lines to the config: recv: placeholder: encryption: off The zrepl user guide says: For encrypted-send-to-untrusted-receiver, the placeholder datasets need to be created with -o encryption=off. This doesn’t mean the data gets transferred or stored unencrypted. After setting everything up I ‘ve got: FILTER ┌────────────┐╔══════════════════════════════════════════════════════════════════════╗ │jobs │║Job: client_to_master ║ │└──client_to│║Type: push ▒║ │ │║ ▒║ │ │║Replication: ▒║ │ │║ Attempt #1 ▒║ │ │║ Status: done ▒║ │ │║ Last Run: 2026-03-03 21:02:50 +0100 CET (lasted 2s) ▒║ │ │║ tank/storage/vault DONE (step 1/1, 1.6 KiB/624 B) ▒║ │ │║ ▒║ │ │║Pruning Sender: ▒║ │ │║ Status: Done ▒║ │ │║ tank/storage/vault Completed (destroy 1 of 11 snapshots) ▒║ │ │║ ▒║ │ │║Pruning Receiver: ▒║ │ │║ Status: Done ▒║ │ │║ tank skipped: filesystem is placeholder ▒║ │ │║ tank/storage skipped: filesystem is placeholder ▒║ │ │║ tank/storage/vault Completed (destroy 1 of 20 snapshots) ▒║ │ │║ ▒║ └────────────┘╚══════════════════════════════════════════════════════════════════════╝ 2026-03-03T21:09:00+01:00Q quit &lt;TAB&gt; switch panes W wrap lines Shift+M toggle nav It seems the service runs just fine: root@omnibackup:~# svcs -xv The snapshots are encrypted: root@omnibackup:~# zfs list -r -t snapshot -o name,encryption storage NAME ENCRYPTION storage/zrepl/sink/client_nas/tank/storage/vault@zrepl_20260304_032248_000 aes-256-ccm storage/zrepl/sink/client_nas/tank/storage/vault@zrepl_20260304_033248_000 aes-256-ccm storage/zrepl/sink/client_nas/tank/storage/vault@zrepl_20260304_034248_000 aes-256-ccm storage/zrepl/sink/client_nas/tank/storage/vault@zrepl_20260304_035248_000 aes-256-ccm The backup host doesn’t posess the encryption key: root@omnibackup:~# zfs get encryption,keylocation,keyformat,keystatus storage/zrepl/sink/client_nas/tank/storage/vault@zrepl_20260304_035248_000 NAME PROPERTY VALUE SOURCE storage/zrepl/sink/client_nas/tank/storage/vault@zrepl_20260304_035248_000 encryption aes-256-ccm - storage/zrepl/sink/client_nas/tank/storage/vault@zrepl_20260304_035248_000 keylocation - - storage/zrepl/sink/client_nas/tank/storage/vault@zrepl_20260304_035248_000 keyformat - - storage/zrepl/sink/client_nas/tank/storage/vault@zrepl_20260304_035248_000 keystatus unavailable - root@omnibackup:~# Hi and thanks for reading my blog! Pic]]></summary></entry><entry><title type="html">Running Redis in LX zone</title><link href="http://extrowerk.com/2025-10-09/Runing-Redis-in-LX-zone.html" rel="alternate" type="text/html" title="Running Redis in LX zone" /><published>2025-10-09T02:01:00+02:00</published><updated>2025-10-09T02:01:00+02:00</updated><id>http://extrowerk.com/2025-10-09/Runing-Redis-in-LX-zone</id><content type="html" xml:base="http://extrowerk.com/2025-10-09/Runing-Redis-in-LX-zone.html"><![CDATA[<p><img src="/img/2025-10-09_redis.jpg" alt="Not the same Redis" /></p>

<p><code class="language-plaintext highlighter-rouge">Systemctl</code> throws a hiss if you attempt to run redis in a LX branded zone.</p>
<div class="language-plaintext highlighter-rouge"><div class="highlight"><pre class="highlight"><code>Oct 08 21:37:57 paperless (s-s[4078]: redis-server.service: Failed at step USER spawning /usr/bin/redis-server: Operation not permitted
Oct 08 21:37:57 paperless (s-s[4078]: redis-server.service: Failed to set up user namespacing: Operation not permitted
</code></pre></div></div>

<p>The solusion is pretty simple, we need to create an <code class="language-plaintext highlighter-rouge">override.conf</code> file with the following content:</p>
<div class="language-plaintext highlighter-rouge"><div class="highlight"><pre class="highlight"><code>root@paperless:~# mkdir -p /etc/systemd/system/redis.service.d/
root@paperless:~# cat /etc/systemd/system/redis.service.d/override.conf
[Service]
PrivateUsers=false
root@paperless:~# 
</code></pre></div></div>

<p>Now we need to reload the service database and start redis:</p>
<div class="language-plaintext highlighter-rouge"><div class="highlight"><pre class="highlight"><code>systemctl daemon-reload
systemctl start redis.service
</code></pre></div></div>

<p>The result:</p>
<div class="language-plaintext highlighter-rouge"><div class="highlight"><pre class="highlight"><code>root@paperless:~# systemctl status redis.service
● redis-server.service - Advanced key-value store
     Loaded: loaded (/lib/systemd/system/redis-server.service; enabled; preset: enabled)
    Drop-In: /etc/systemd/system/redis.service.d
             └─override.conf
     Active: active (running) since Thu 2025-10-09 10:18:12 CEST; 41s ago
       Docs: http://redis.io/documentation,
             man:redis-server(1)
   Main PID: 22743 ((s-server))
     Status: "Ready to accept connections"
     CGroup: /system.slice/redis-server.service
             └─22743 "/usr/bin/redis-server 127.0.0.1:6379"
</code></pre></div></div>

<p><a href="https://commons.wikimedia.org/wiki/File:Heintze_%26_Blanckertz_%E2%80%94_1146_REDIS_%E2%80%93_1_mm_DSC_0678.jpg">Pic</a></p>]]></content><author><name>z</name></author><summary type="html"><![CDATA[Systemctl throws a hiss if you attempt to run redis in a LX branded zone. Oct 08 21:37:57 paperless (s-s[4078]: redis-server.service: Failed at step USER spawning /usr/bin/redis-server: Operation not permitted Oct 08 21:37:57 paperless (s-s[4078]: redis-server.service: Failed to set up user namespacing: Operation not permitted The solusion is pretty simple, we need to create an override.conf file with the following content: root@paperless:~# mkdir -p /etc/systemd/system/redis.service.d/ root@paperless:~# cat /etc/systemd/system/redis.service.d/override.conf [Service] PrivateUsers=false root@paperless:~# Now we need to reload the service database and start redis: systemctl daemon-reload systemctl start redis.service The result: root@paperless:~# systemctl status redis.service ● redis-server.service - Advanced key-value store Loaded: loaded (/lib/systemd/system/redis-server.service; enabled; preset: enabled) Drop-In: /etc/systemd/system/redis.service.d └─override.conf Active: active (running) since Thu 2025-10-09 10:18:12 CEST; 41s ago Docs: http://redis.io/documentation, man:redis-server(1) Main PID: 22743 ((s-server)) Status: "Ready to accept connections" CGroup: /system.slice/redis-server.service └─22743 "/usr/bin/redis-server 127.0.0.1:6379" Pic]]></summary></entry><entry><title type="html">Automatically load IPF rules after reboot</title><link href="http://extrowerk.com/2025-07-03/OmniOS-automatically-load-IPF-rules.html" rel="alternate" type="text/html" title="Automatically load IPF rules after reboot" /><published>2025-07-03T02:01:00+02:00</published><updated>2025-07-03T02:01:00+02:00</updated><id>http://extrowerk.com/2025-07-03/OmniOS-automatically-load-IPF-rules</id><content type="html" xml:base="http://extrowerk.com/2025-07-03/OmniOS-automatically-load-IPF-rules.html"><![CDATA[<p><img src="/img/2025-07-03_firewall.jpg" alt="Firewall" /></p>

<p>I had configured some firewall rules on my NAS, which initially seemed to work correctly. However, I later noticed that the rules were not being applied after the NAS was rebooted.</p>

<p>I began investigating the issue. First, I removed all customizations and disabled, then re-enabled the IP filter service. After rebooting the NAS, I examined the current state of the system:</p>

<div class="language-plaintext highlighter-rouge"><div class="highlight"><pre class="highlight"><code>root@omnios:~# svcs |grep ipf
online         11:03:32 svc:/network/ipfilter:default
</code></pre></div></div>

<p>Okay, ipfilter service is enabled and running. Let’s identify the files the system relies on.</p>

<div class="language-plaintext highlighter-rouge"><div class="highlight"><pre class="highlight"><code>root@omnios:~# svccfg -s ipfilter:default listprop | grep file
config/ipf6_config_file                       astring  /etc/ipf/ipf6.conf
config/ipnat_config_file                      astring  /etc/ipf/ipnat.conf
config/ippool_config_file                     astring  /etc/ipf/ippool.conf
firewall_config_default/custom_policy_file    astring  /etc/ipf/ipf.conf
firewall_config_default/custom_policy_file_6  astring  /etc/ipf/ipf6.conf
restarter/logfile                             astring  /var/svc/log/network-ipfilter:default.log
</code></pre></div></div>

<p>All settings seem to be at their defaults. Next, we’ll add a basic ruleset.</p>

<div class="language-plaintext highlighter-rouge"><div class="highlight"><pre class="highlight"><code>root@omnios:~# cat /etc/ipf/ipf.conf
#
# ipf.conf
#
# IP Filter rules to be loaded during startup
#
# See ipf(5) manpage for more information on
# IP Filter rules syntax.

# no restrictions on loopback interface
pass in quick on lo0 all
pass out quick on lo0 all

block in all
pass  in quick on e1000g0 proto icmp keep state
pass  in quick on e1000g0 proto tcp to port = 22 keep state
pass out all
</code></pre></div></div>

<p>Now lets reboot and check the rules loaded:</p>

<div class="language-plaintext highlighter-rouge"><div class="highlight"><pre class="highlight"><code>root@omnios:~# ipfstat -io
empty list for ipfilter(out)
empty list for ipfilter(in)
</code></pre></div></div>

<p>Hmm, something seems off. Interestingly, the firewall rules are correctly loaded if I manually instruct the system to apply them.</p>

<div class="language-plaintext highlighter-rouge"><div class="highlight"><pre class="highlight"><code>root@omnios:~# ipf -Fa -f /etc/ipf/ipf.conf
</code></pre></div></div>

<p>Reviewing the logs doesn’t reveal any obvious cause:</p>

<div class="language-plaintext highlighter-rouge"><div class="highlight"><pre class="highlight"><code>root@omnios:~# cat $(svcs -L /network/ipfilter)
[ Jul  3 11:03:27 Enabled. ]
[ Jul  3 11:03:30 Executing start method ("/lib/svc/method/ipfilter start"). ]
Set 0 now inactive
filter sync'd
0 entries flushed from NAT table
4 entries flushed from NAT list
[ Jul  3 11:03:32 Method "start" exited with status 0. ]
</code></pre></div></div>

<p>I got the following hint from tsoome:</p>

<div class="language-plaintext highlighter-rouge"><div class="highlight"><pre class="highlight"><code>sometimes, it may happen, the guides are bad.  from that log, see into /lib/svc/method/ipfilter - from it you will find the function to upgrade config and hint that you should have firewall_config_default/policy                astring  custom if you want to use those config files....  :P see also output from "svccfg -s ipfilter:default listprop"
</code></pre></div></div>

<p>Let’s check what do we got here:</p>

<div class="language-plaintext highlighter-rouge"><div class="highlight"><pre class="highlight"><code>root@omnios:~# svccfg -s ipfilter:default listprop |grep firewall_config_default/policy
firewall_config_default/policy                astring  none
</code></pre></div></div>

<p>Okay, this is default. Let’s try to modify the property value to “custom”:</p>

<div class="language-plaintext highlighter-rouge"><div class="highlight"><pre class="highlight"><code>root@omnios:~# svccfg -s ipfilter:default setprop firewall_config_default/policy = custom
root@omnios:~# svcadm refresh ipfilter:default
</code></pre></div></div>

<p>After reboot:</p>

<div class="language-plaintext highlighter-rouge"><div class="highlight"><pre class="highlight"><code>root@omnios:~# ipfstat -io
pass out quick on lo0 all
pass out all
pass in quick on lo0 all
block in all
pass in quick on e1000g0 proto icmp from any to any keep state
pass in quick on e1000g0 proto tcp from any to any port = ssh keep state
</code></pre></div></div>

<p>It’s all working perfectly now! Lessons learned.</p>

<p><a href="https://commons.wikimedia.org/wiki/File:Kommunisticheskaya_Street_5_2011-10_1317481415.JPG">Pic</a></p>]]></content><author><name>z</name></author><summary type="html"><![CDATA[I had configured some firewall rules on my NAS, which initially seemed to work correctly. However, I later noticed that the rules were not being applied after the NAS was rebooted. I began investigating the issue. First, I removed all customizations and disabled, then re-enabled the IP filter service. After rebooting the NAS, I examined the current state of the system: root@omnios:~# svcs |grep ipf online 11:03:32 svc:/network/ipfilter:default Okay, ipfilter service is enabled and running. Let’s identify the files the system relies on. root@omnios:~# svccfg -s ipfilter:default listprop | grep file config/ipf6_config_file astring /etc/ipf/ipf6.conf config/ipnat_config_file astring /etc/ipf/ipnat.conf config/ippool_config_file astring /etc/ipf/ippool.conf firewall_config_default/custom_policy_file astring /etc/ipf/ipf.conf firewall_config_default/custom_policy_file_6 astring /etc/ipf/ipf6.conf restarter/logfile astring /var/svc/log/network-ipfilter:default.log All settings seem to be at their defaults. Next, we’ll add a basic ruleset. root@omnios:~# cat /etc/ipf/ipf.conf # # ipf.conf # # IP Filter rules to be loaded during startup # # See ipf(5) manpage for more information on # IP Filter rules syntax. # no restrictions on loopback interface pass in quick on lo0 all pass out quick on lo0 all block in all pass in quick on e1000g0 proto icmp keep state pass in quick on e1000g0 proto tcp to port = 22 keep state pass out all Now lets reboot and check the rules loaded: root@omnios:~# ipfstat -io empty list for ipfilter(out) empty list for ipfilter(in) Hmm, something seems off. Interestingly, the firewall rules are correctly loaded if I manually instruct the system to apply them. root@omnios:~# ipf -Fa -f /etc/ipf/ipf.conf Reviewing the logs doesn’t reveal any obvious cause: root@omnios:~# cat $(svcs -L /network/ipfilter) [ Jul 3 11:03:27 Enabled. ] [ Jul 3 11:03:30 Executing start method ("/lib/svc/method/ipfilter start"). ] Set 0 now inactive filter sync'd 0 entries flushed from NAT table 4 entries flushed from NAT list [ Jul 3 11:03:32 Method "start" exited with status 0. ] I got the following hint from tsoome: sometimes, it may happen, the guides are bad. from that log, see into /lib/svc/method/ipfilter - from it you will find the function to upgrade config and hint that you should have firewall_config_default/policy astring custom if you want to use those config files.... :P see also output from "svccfg -s ipfilter:default listprop" Let’s check what do we got here: root@omnios:~# svccfg -s ipfilter:default listprop |grep firewall_config_default/policy firewall_config_default/policy astring none Okay, this is default. Let’s try to modify the property value to “custom”: root@omnios:~# svccfg -s ipfilter:default setprop firewall_config_default/policy = custom root@omnios:~# svcadm refresh ipfilter:default After reboot: root@omnios:~# ipfstat -io pass out quick on lo0 all pass out all pass in quick on lo0 all block in all pass in quick on e1000g0 proto icmp from any to any keep state pass in quick on e1000g0 proto tcp from any to any port = ssh keep state It’s all working perfectly now! Lessons learned. Pic]]></summary></entry><entry><title type="html">Fixing a blinking Windows Terminal</title><link href="http://extrowerk.com/2025-07-03/Fixing-Windows-Term.html" rel="alternate" type="text/html" title="Fixing a blinking Windows Terminal" /><published>2025-07-03T02:01:00+02:00</published><updated>2025-07-03T02:01:00+02:00</updated><id>http://extrowerk.com/2025-07-03/Fixing-Windows-Term</id><content type="html" xml:base="http://extrowerk.com/2025-07-03/Fixing-Windows-Term.html"><![CDATA[<p><img src="/img/2025-08-26_terminal.jpg" alt="Eternal 70's" /></p>

<p>Connecting to my OmniOS NAS from the Windows 10 Terminal causes a blinking issue in <code class="language-plaintext highlighter-rouge">nano</code>. I usually fix it with:</p>

<div class="language-plaintext highlighter-rouge"><div class="highlight"><pre class="highlight"><code>% export TERM=vt100
</code></pre></div></div>
<p>But I sometimes forget - which can be a health risk.</p>

<p>I don’t want this in my shell config, since other terminal emulators work fine and need better <code class="language-plaintext highlighter-rouge">TERM</code> settings. So I added this to my <code class="language-plaintext highlighter-rouge">.ssh/config</code> on the Windows machine:</p>

<div class="language-plaintext highlighter-rouge"><div class="highlight"><pre class="highlight"><code>host NAS
  HostName NAS
  User username
  RequestTTY force
  RemoteCommand export TERM=vt100 &amp;&amp; zsh
</code></pre></div></div>

<p>Now <code class="language-plaintext highlighter-rouge">TERM</code> is set only for this client - no more blinking - and everything else stays unaffected. Maybe one day we can leave 70’s terminal quirks behind.</p>

<p><a href="https://upload.wikimedia.org/wikipedia/commons/thumb/d/d8/Colossal_Cave_Adventure_on_VT100_terminal.jpg/1024px-Colossal_Cave_Adventure_on_VT100_terminal.jpg">Pic</a></p>]]></content><author><name>z</name></author><summary type="html"><![CDATA[Connecting to my OmniOS NAS from the Windows 10 Terminal causes a blinking issue in nano. I usually fix it with: % export TERM=vt100 But I sometimes forget - which can be a health risk. I don’t want this in my shell config, since other terminal emulators work fine and need better TERM settings. So I added this to my .ssh/config on the Windows machine: host NAS HostName NAS User username RequestTTY force RemoteCommand export TERM=vt100 &amp;&amp; zsh Now TERM is set only for this client - no more blinking - and everything else stays unaffected. Maybe one day we can leave 70’s terminal quirks behind. Pic]]></summary></entry><entry><title type="html">Cron based ZFS snapshot</title><link href="http://extrowerk.com/2025-06-30/OmniOS-ZFS-autosnapshot.html" rel="alternate" type="text/html" title="Cron based ZFS snapshot" /><published>2025-06-30T02:01:00+02:00</published><updated>2025-06-30T02:01:00+02:00</updated><id>http://extrowerk.com/2025-06-30/OmniOS-ZFS-autosnapshot</id><content type="html" xml:base="http://extrowerk.com/2025-06-30/OmniOS-ZFS-autosnapshot.html"><![CDATA[<p><img src="/img/2025-06-30_snapshot.jpg" alt="Snapshot" /></p>

<p>ZFS snapshots are a simple and secure way to store a read-only state of a file system that can be restored in the event of accidental data loss, transferred, and replicated to another machine for backup.</p>

<p>I wanted the NAS to take a snapshot every day and keep the last 7 snapshots. Here’s how I did it:</p>

<div class="language-plaintext highlighter-rouge"><div class="highlight"><pre class="highlight"><code># cat zfs_snapshot_create.sh
#!/usr/bin/env zsh

# Daily ZFS Snapshot with Pushover Notification

# CONFIGURATION
DATE=$(date +%Y-%m-%d)
SNAPSHOT_PREFIX="autobackup_${DATE}"
PUSHOVER_USER_KEY="${PUSHOVER_USER_KEY:-}"     # set via env
PUSHOVER_API_TOKEN="${PUSHOVER_API_TOKEN:-}"   # set via env
PUSHOVER_API_URL="https://api.pushover.net:443/1/messages.json"
LOGFILE="/var/log/zfs_snapshot_create.log"
HOSTNAME="$(hostname)"

# Function: Send pushover notification
send_pushover() {
    local title="$1"
    local message="$2"
    [[ -n "$PUSHOVER_USER_KEY" &amp;&amp; -n "$PUSHOVER_API_TOKEN" ]] || return

    curl -s \
        -F "token=${PUSHOVER_API_TOKEN}" \
        -F "user=${PUSHOVER_USER_KEY}" \
        -F "title=${title}" \
        -F "message=${message}" \
        ${PUSHOVER_API_URL} &gt;/dev/null
}

# Start Logging
{
    echo "[$(date)] Starting ZFS snapshot creation..."

    for pool in "tank" "rpool"; do
        SNAPSHOT_NAME="${pool}@${SNAPSHOT_PREFIX}"
        echo "Creating snapshot: ${SNAPSHOT_NAME}"

        if /usr/sbin/zfs snapshot -r "${SNAPSHOT_NAME}"; then
            echo "Snapshot ${SNAPSHOT_NAME} created successfully."
            send_pushover "ZFS Snapshot Success (${HOSTNAME})" \
                "Snapshot created: ${SNAPSHOT_NAME}"
        else
            echo "Error: Failed to create snapshot ${SNAPSHOT_NAME}"
            send_pushover "ZFS Snapshot FAILED (${HOSTNAME})" \
                "Snapshot failed: ${SNAPSHOT_NAME}"
        fi
    done

    echo "[$(date)] Snapshot creation finished."

} &gt;&gt; "$LOGFILE" 2&gt;&amp;1
</code></pre></div></div>

<p>This script creates <code class="language-plaintext highlighter-rouge">autobackup_$currentdate</code> snapshots recursively for the <code class="language-plaintext highlighter-rouge">tank</code> and <code class="language-plaintext highlighter-rouge">rpool</code> pools.</p>

<div class="language-plaintext highlighter-rouge"><div class="highlight"><pre class="highlight"><code># cat zfs_snapshot_delete.sh

#!/usr/bin/zsh

# Configuration
PUSHOVER_USER_KEY="${PUSHOVER_USER_KEY:-}"     # set via env
PUSHOVER_API_TOKEN="${PUSHOVER_API_TOKEN:-}"   # set via env
PUSHOVER_API_URL="https://api.pushover.net:443/1/messages.json"
LOG_FILE="/var/log/zfs_snapshot_delete.log"
RETENTION=7  # Number of snapshots to retain

# Function to send Pushover notification
send_pushover_notification() {
    local message=$1
    local title=$2
    curl -s \
         -F "token=${PUSHOVER_API_TOKEN}" \
         -F "user=${PUSHOVER_USER_KEY}" \
         -F "message=${message}" \
         -F "title=${title}" \
         ${PUSHOVER_API_URL} &gt; /dev/null 2&gt;&amp;1
}

# Function to delete old snapshots for a given ZFS pool
delete_old_snapshots() {
    local pool_name=$1
    local pool_label=$2

    echo "Checking snapshots for ${pool_name}..." | tee -a ${LOG_FILE}

    # Get the snapshots and delete all except the last RETENTION number of snapshots
    local snapshots
    snapshots=$(/usr/sbin/zfs list -d 1 -o name -t snapshot | grep "${pool_name}@autobackup" | sort | awk -v x=$RETENTION '{line[NR]=$0} END {for (i=1; i&lt;=NR - x; i++) print line[i]}')

    if [ -n "$snapshots" ]; then
        echo "Deleting the following snapshots:" | tee -a ${LOG_FILE}
        echo "$snapshots" | tee -a ${LOG_FILE}
        echo "$snapshots" | xargs /usr/sbin/zfs destroy -r
        
        if [ $? -eq 0 ]; then
            local message="Successfully deleted old snapshots for ${pool_label}. Retained ${RETENTION} most recent snapshots."
            echo "$message" | tee -a ${LOG_FILE}
            send_pushover_notification "$message" "ZFS Snapshot Cleanup"
        else
            local message="Failed to delete snapshots for ${pool_label}. Please check the logs."
            echo "$message" | tee -a ${LOG_FILE}
            send_pushover_notification "$message" "ZFS Snapshot Cleanup"
        fi
    else
        # No snapshots to delete
        local message="No snapshots to delete for ${pool_label}. All snapshots are within the retention limit."
        echo "$message" | tee -a ${LOG_FILE}
        send_pushover_notification "$message" "ZFS Snapshot Cleanup"
    fi
}

# Main process
clear
echo "Starting ZFS snapshot cleanup process..." | tee -a ${LOG_FILE}
# send_pushover_notification "ZFS Snapshot Cleanup started." "ZFS Snapshot Cleanup"

# Delete snapshots for each pool
delete_old_snapshots "tank" "Tank Pool"
delete_old_snapshots "rpool" "Root Pool"

# Completion message
echo "ZFS snapshot cleanup completed." | tee -a ${LOG_FILE}
# send_pushover_notification "ZFS Snapshot Cleanup completed successfully." "ZFS Snapshot Cleanup"

</code></pre></div></div>

<p>To automatically run it, add the following to your root crontab:</p>
<div class="language-plaintext highlighter-rouge"><div class="highlight"><pre class="highlight"><code># Create daily ZFS anapshots
10 6 * * * PUSHOVER_USER_KEY=xxxxx PUSHOVER_API_TOKEN=yyyyyyy /root/zfs_snapshot_create.sh

# Keep the last 7 snapshots and delete the rest:
20 6 * * * PUSHOVER_USER_KEY=xxxxx PUSHOVER_API_TOKEN=yyyyyyy /root/zfs_snapshot_delete.sh
</code></pre></div></div>

<p>This will create the snapshots every day at 6:10 AM and delete them at 6:20AM.</p>

<p><a href="https://commons.wikimedia.org/wiki/File:Munich_Subway_Station_Georg-Brauchle-Ring,_April_2017.jpg">Pic</a></p>]]></content><author><name>z</name></author><summary type="html"><![CDATA[ZFS snapshots are a simple and secure way to store a read-only state of a file system that can be restored in the event of accidental data loss, transferred, and replicated to another machine for backup. I wanted the NAS to take a snapshot every day and keep the last 7 snapshots. Here’s how I did it: # cat zfs_snapshot_create.sh #!/usr/bin/env zsh # Daily ZFS Snapshot with Pushover Notification # CONFIGURATION DATE=$(date +%Y-%m-%d) SNAPSHOT_PREFIX="autobackup_${DATE}" PUSHOVER_USER_KEY="${PUSHOVER_USER_KEY:-}" # set via env PUSHOVER_API_TOKEN="${PUSHOVER_API_TOKEN:-}" # set via env PUSHOVER_API_URL="https://api.pushover.net:443/1/messages.json" LOGFILE="/var/log/zfs_snapshot_create.log" HOSTNAME="$(hostname)" # Function: Send pushover notification send_pushover() { local title="$1" local message="$2" [[ -n "$PUSHOVER_USER_KEY" &amp;&amp; -n "$PUSHOVER_API_TOKEN" ]] || return curl -s \ -F "token=${PUSHOVER_API_TOKEN}" \ -F "user=${PUSHOVER_USER_KEY}" \ -F "title=${title}" \ -F "message=${message}" \ ${PUSHOVER_API_URL} &gt;/dev/null } # Start Logging { echo "[$(date)] Starting ZFS snapshot creation..." for pool in "tank" "rpool"; do SNAPSHOT_NAME="${pool}@${SNAPSHOT_PREFIX}" echo "Creating snapshot: ${SNAPSHOT_NAME}" if /usr/sbin/zfs snapshot -r "${SNAPSHOT_NAME}"; then echo "Snapshot ${SNAPSHOT_NAME} created successfully." send_pushover "ZFS Snapshot Success (${HOSTNAME})" \ "Snapshot created: ${SNAPSHOT_NAME}" else echo "Error: Failed to create snapshot ${SNAPSHOT_NAME}" send_pushover "ZFS Snapshot FAILED (${HOSTNAME})" \ "Snapshot failed: ${SNAPSHOT_NAME}" fi done echo "[$(date)] Snapshot creation finished." } &gt;&gt; "$LOGFILE" 2&gt;&amp;1 This script creates autobackup_$currentdate snapshots recursively for the tank and rpool pools. # cat zfs_snapshot_delete.sh #!/usr/bin/zsh # Configuration PUSHOVER_USER_KEY="${PUSHOVER_USER_KEY:-}" # set via env PUSHOVER_API_TOKEN="${PUSHOVER_API_TOKEN:-}" # set via env PUSHOVER_API_URL="https://api.pushover.net:443/1/messages.json" LOG_FILE="/var/log/zfs_snapshot_delete.log" RETENTION=7 # Number of snapshots to retain # Function to send Pushover notification send_pushover_notification() { local message=$1 local title=$2 curl -s \ -F "token=${PUSHOVER_API_TOKEN}" \ -F "user=${PUSHOVER_USER_KEY}" \ -F "message=${message}" \ -F "title=${title}" \ ${PUSHOVER_API_URL} &gt; /dev/null 2&gt;&amp;1 } # Function to delete old snapshots for a given ZFS pool delete_old_snapshots() { local pool_name=$1 local pool_label=$2 echo "Checking snapshots for ${pool_name}..." | tee -a ${LOG_FILE} # Get the snapshots and delete all except the last RETENTION number of snapshots local snapshots snapshots=$(/usr/sbin/zfs list -d 1 -o name -t snapshot | grep "${pool_name}@autobackup" | sort | awk -v x=$RETENTION '{line[NR]=$0} END {for (i=1; i&lt;=NR - x; i++) print line[i]}') if [ -n "$snapshots" ]; then echo "Deleting the following snapshots:" | tee -a ${LOG_FILE} echo "$snapshots" | tee -a ${LOG_FILE} echo "$snapshots" | xargs /usr/sbin/zfs destroy -r if [ $? -eq 0 ]; then local message="Successfully deleted old snapshots for ${pool_label}. Retained ${RETENTION} most recent snapshots." echo "$message" | tee -a ${LOG_FILE} send_pushover_notification "$message" "ZFS Snapshot Cleanup" else local message="Failed to delete snapshots for ${pool_label}. Please check the logs." echo "$message" | tee -a ${LOG_FILE} send_pushover_notification "$message" "ZFS Snapshot Cleanup" fi else # No snapshots to delete local message="No snapshots to delete for ${pool_label}. All snapshots are within the retention limit." echo "$message" | tee -a ${LOG_FILE} send_pushover_notification "$message" "ZFS Snapshot Cleanup" fi } # Main process clear echo "Starting ZFS snapshot cleanup process..." | tee -a ${LOG_FILE} # send_pushover_notification "ZFS Snapshot Cleanup started." "ZFS Snapshot Cleanup" # Delete snapshots for each pool delete_old_snapshots "tank" "Tank Pool" delete_old_snapshots "rpool" "Root Pool" # Completion message echo "ZFS snapshot cleanup completed." | tee -a ${LOG_FILE} # send_pushover_notification "ZFS Snapshot Cleanup completed successfully." "ZFS Snapshot Cleanup" To automatically run it, add the following to your root crontab: # Create daily ZFS anapshots 10 6 * * * PUSHOVER_USER_KEY=xxxxx PUSHOVER_API_TOKEN=yyyyyyy /root/zfs_snapshot_create.sh # Keep the last 7 snapshots and delete the rest: 20 6 * * * PUSHOVER_USER_KEY=xxxxx PUSHOVER_API_TOKEN=yyyyyyy /root/zfs_snapshot_delete.sh This will create the snapshots every day at 6:10 AM and delete them at 6:20AM. Pic]]></summary></entry><entry><title type="html">Interfacing an analog joystick using Forth</title><link href="http://extrowerk.com/2025-05-28/Forth_Analog_Joystick.html" rel="alternate" type="text/html" title="Interfacing an analog joystick using Forth" /><published>2025-05-28T02:01:00+02:00</published><updated>2025-05-28T02:01:00+02:00</updated><id>http://extrowerk.com/2025-05-28/Forth_Analog_Joystick</id><content type="html" xml:base="http://extrowerk.com/2025-05-28/Forth_Analog_Joystick.html"><![CDATA[<p><img src="/img/2025-05-28_joystick.jpg" alt="Joystick" /></p>

<div class="language-plaintext highlighter-rouge"><div class="highlight"><pre class="highlight"><code>pin import
adc import

26 constant x_pin ( GPIO pin of the X axis )
27 constant y_pin ( GPIO pin of the Y axis )
2 constant button_pin ( GPIO pin used for the button )
button_pin pull-up-pin ( Defining the button pin as pull-up )

: get-adc-chan pin-adc-chan ; ( Getting the ADC channel of the passed pin )
: x-pin-adc x_pin get-adc-chan ; ( Get the ADC channel of the x-axis pin )
: y-pin-adc y_pin get-adc-chan ; ( Likewise for the y-axis )
: read-adc default-adc adc@ ; ( Define the read word )

: joy_x x-pin-adc read-adc ." X: " . ; ( Constructing the output )
: joy_y y-pin-adc read-adc ." Y: " . ;
: button button_pin pin@ ." Button: " . ;

: print-joys joy_x joy_y button cr ; ( Concenating the outputs )

: joy ( -- )
	begin key? not while print-joys 100 ms repeat ( print output repeatedly till a key gets pressed )
	key drop ( then exit )
;
</code></pre></div></div>

<p>Example output:</p>

<div class="language-plaintext highlighter-rouge"><div class="highlight"><pre class="highlight"><code>X: 4013 Y: 1856 Button: 0 
X: 2034 Y: 1552 Button: 0 
X: 1807 Y: 1134 Button: -1 
X: 1033 Y: 432 Button: 0 
X: 324 Y: 25 Button: -1
</code></pre></div></div>

<p>In Forth -1 considered as <code class="language-plaintext highlighter-rouge">true</code> while 0 is <code class="language-plaintext highlighter-rouge">false</code>.</p>

<p><a href="https://commons.wikimedia.org/wiki/File:Joystick_days.jpg">Pic</a></p>]]></content><author><name>z</name></author><summary type="html"><![CDATA[pin import adc import 26 constant x_pin ( GPIO pin of the X axis ) 27 constant y_pin ( GPIO pin of the Y axis ) 2 constant button_pin ( GPIO pin used for the button ) button_pin pull-up-pin ( Defining the button pin as pull-up ) : get-adc-chan pin-adc-chan ; ( Getting the ADC channel of the passed pin ) : x-pin-adc x_pin get-adc-chan ; ( Get the ADC channel of the x-axis pin ) : y-pin-adc y_pin get-adc-chan ; ( Likewise for the y-axis ) : read-adc default-adc adc@ ; ( Define the read word ) : joy_x x-pin-adc read-adc ." X: " . ; ( Constructing the output ) : joy_y y-pin-adc read-adc ." Y: " . ; : button button_pin pin@ ." Button: " . ; : print-joys joy_x joy_y button cr ; ( Concenating the outputs ) : joy ( -- ) begin key? not while print-joys 100 ms repeat ( print output repeatedly till a key gets pressed ) key drop ( then exit ) ; Example output: X: 4013 Y: 1856 Button: 0 X: 2034 Y: 1552 Button: 0 X: 1807 Y: 1134 Button: -1 X: 1033 Y: 432 Button: 0 X: 324 Y: 25 Button: -1 In Forth -1 considered as true while 0 is false. Pic]]></summary></entry><entry><title type="html">Transmission in pkgsrc zone on OmniOS</title><link href="http://extrowerk.com/2025-01-11/Transmission-on-OmniOS-pkgsrc-zone.html" rel="alternate" type="text/html" title="Transmission in pkgsrc zone on OmniOS" /><published>2025-01-11T01:01:00+01:00</published><updated>2025-01-11T01:01:00+01:00</updated><id>http://extrowerk.com/2025-01-11/Transmission-on-OmniOS-pkgsrc-zone</id><content type="html" xml:base="http://extrowerk.com/2025-01-11/Transmission-on-OmniOS-pkgsrc-zone.html"><![CDATA[<p><img src="/img/2025-01-11_omni.jpg" alt="Omni" /></p>

<p>We will use zadm for zone administration, installation is simple:</p>

<div class="language-plaintext highlighter-rouge"><div class="highlight"><pre class="highlight"><code># pkg install zadm
</code></pre></div></div>

<p>We need a vnic for our zone, so let’s create an instance:</p>

<div class="language-plaintext highlighter-rouge"><div class="highlight"><pre class="highlight"><code># dladm create-vnic -l e1000g0 zone_transmission_0
</code></pre></div></div>

<p>Then set up the zone with zadm:</p>

<div class="language-plaintext highlighter-rouge"><div class="highlight"><pre class="highlight"><code># zadm create -b pkgsrc transmission
</code></pre></div></div>

<p>The zone config will open in your $EDITOR, modify it like shown below:</p>
<div class="language-plaintext highlighter-rouge"><div class="highlight"><pre class="highlight"><code>{
   "autoboot" : "true",
   "bootargs" : "",
   "brand" : "pkgsrc",
   "dns-domain" : "lan",
   "fs" : [
      {
         "dir" : "/torrent",
         "options" : [
            "rw"
         ],
         "special" : "/mnt/torrent",
         "type" : "lofs"
      }
   ],
   "fs-allowed" : "",
   "hostid" : "",
   "ip-type" : "exclusive",
   "limitpriv" : "default",
   "net" : [
      {
         "physical" : "zone_transmission_0"
      }
   ],
   "pool" : "",
   "resolvers" : [
      "10.0.0.1"
   ],
   "scheduling-class" : "",
   "zonename" : "transmission",
   "zonepath" : "/zones/transmission"
}
</code></pre></div></div>

<p>Save and close the editor, zadm will create the zone as requested:</p>

<div class="language-plaintext highlighter-rouge"><div class="highlight"><pre class="highlight"><code># zadm list                                                           
NAME              STATUS     BRAND       RAM    CPUS  SHARES
global            running    ipkg        16G       4       1
transmission      installed  pkgsrc        -       -       1
</code></pre></div></div>

<p>Let’s boot our new zone:</p>

<div class="language-plaintext highlighter-rouge"><div class="highlight"><pre class="highlight"><code># zadm boot transmission
</code></pre></div></div>

<p>also console into it:</p>

<div class="language-plaintext highlighter-rouge"><div class="highlight"><pre class="highlight"><code># zlogin transmission
[Connected to zone 'transmission' pts/8]
Last login: Sat Jan 11 09:01:49 2025 on pts/3
OmniOS r151052  omnios-r151052-dbe4644ba92      November 2024
root@transmission:~#
</code></pre></div></div>

<p>Set up our networking:</p>
<div class="language-plaintext highlighter-rouge"><div class="highlight"><pre class="highlight"><code>ipadm create-addr -T static -a 10.0.0.30/24 zone_transmission_0/v4
route -p add default 10.0.0.1
</code></pre></div></div>

<p>Install transmission-daemon using pkgin:</p>

<div class="language-plaintext highlighter-rouge"><div class="highlight"><pre class="highlight"><code># pkgin update
# pkgin search transmission
# pkgin in transmission
</code></pre></div></div>

<p>Pkgin automatically created a transmission user for me with 978 UID and 100 GID. This will be important later on.</p>

<p>Transmission gets installed in the <code class="language-plaintext highlighter-rouge">/opt/local/bin</code> folder.</p>

<p>I had to modify the <code class="language-plaintext highlighter-rouge">/etc/passwd</code> file defining a valid home direcotry for the transmission user:</p>

<div class="language-plaintext highlighter-rouge"><div class="highlight"><pre class="highlight"><code>transmission:x:978:100:transmission user:/home/transmission:/false
</code></pre></div></div>
<p>Create the following files:</p>

<p><code class="language-plaintext highlighter-rouge">transmission-daemon.xml</code> :</p>

<div class="language-plaintext highlighter-rouge"><div class="highlight"><pre class="highlight"><code>&lt;?xml version="1.0"?&gt;
&lt;!DOCTYPE service_bundle SYSTEM "/usr/share/lib/xml/dtd/service_bundle.dtd.1"&gt;
&lt;service_bundle type='manifest' name='export'&gt;
        &lt;service name='application/transmission-daemon' type='service' version='1'&gt;
                &lt;!-- Wait for network interfaces to be initialized.  --&gt;
                &lt;dependency name='network' grouping='require_all' restart_on='none' type='service'&gt;
                        &lt;service_fmri value='svc:/milestone/network:default' /&gt;
                &lt;/dependency&gt; 

                &lt;!-- Wait for all local filesystems to be mounted.  --&gt;
                &lt;dependency name='filesystem' grouping='require_all' restart_on='none' type='service'&gt;
                        &lt;service_fmri value='svc:/system/filesystem/local' /&gt;
                &lt;/dependency&gt; 

                &lt;exec_method type='method' name='start' exec='/lib/svc/method/transmission-daemon.sh start' timeout_seconds='60' /&gt;

                &lt;exec_method type='method' name='stop' exec=':kill -9' timeout_seconds='60' /&gt;

                &lt;!--
                        Both action_authorization and value_authorization are needed
                        to allow the framework general/enabled property to be changed
                        when performing action (enable, disable, etc) on the service.
                --&gt;
                &lt;property_group name='general' type='framework'&gt;
                        &lt;propval name='value_authorization' type='astring'
                                value='solaris.smf.value.transmission' /&gt;
                        &lt;propval name='action_authorization' type='astring'
                                value='solaris.smf.manage.transmission' /&gt;
                &lt;/property_group&gt;

                &lt;property_group name='startd' type='framework'&gt;
                        &lt;!-- sub-process core dumps shouldn't restart session --&gt;
                        &lt;propval name='ignore_error' type='astring'
                                value='core,signal' /&gt;
                &lt;/property_group&gt;

                &lt;instance name='default' enabled='false'&gt;

                        &lt;method_context&gt;
                                &lt;method_credential user='transmission' group='transmission' /&gt;
                        &lt;/method_context&gt;

                &lt;/instance&gt;

                &lt;stability value='Evolving' /&gt;

                &lt;template&gt;
                        &lt;common_name&gt;
                                &lt;loctext xml:lang='C'&gt;
                                        Transmission BitTorrent Client (Daemon)
                                &lt;/loctext&gt;
                        &lt;/common_name&gt;
                &lt;/template&gt;

        &lt;/service&gt;

&lt;/service_bundle&gt;

</code></pre></div></div>

<p><code class="language-plaintext highlighter-rouge">transmission-daemon.sh</code> :</p>

<div class="language-plaintext highlighter-rouge"><div class="highlight"><pre class="highlight"><code>#!/bin/sh

. /lib/svc/share/smf_include.sh

# ----- *ADVANCED* CONFIGURATION -----
# Only change these options if you know what you are doing!
#
# The folder where Transmission stores the config &amp; web files.
# ONLY change this you have it at a non-default location
TRANSMISSION_HOME="/home/transmission"
TRANSMISSION_WEB_HOME="/opt/local/share/transmission/public_html"
#
# The arguments passed on to transmission-daemon.
# ONLY change this you need to, otherwise use the
# settings file as per above.
TRANSMISSION_ARGS=" -c /torrent/torrent_file "


# ----- END OF CONFIGURATION -----

PATH=/opt/local/bin:/usr/local/sbin:/usr/local/bin:/usr/sbin:/usr/bin:/sbin:/bin
NAME=transmission-daemon
DAEMON=`which ${NAME}`

# Exit if the package is not installed
[ -x "${DAEMON}" ] || exit $SMF_EXIT_ERR_FATAL

#
# Function that starts the daemon/service
#

do_start()
{
        # Export the configuration/web directory, if set
        if [ -n "$TRANSMISSION_HOME" ]; then
                export TRANSMISSION_HOME
        fi
        if [ -n "$TRANSMISSION_WEB_HOME" ]; then
                export TRANSMISSION_WEB_HOME
        fi

        ${DAEMON} ${TRANSMISSION_ARGS}
}

#
# Function that stops the daemon/service
#
do_stop()
{
        pkill -9 ${NAME}
}

case "$1" in
        start)
                do_start
                ;;
        stop)
                do_stop
                ;;
        refresh)
                do_stop
                do_start
                ;;
        *)
                echo "Usage: ${0} {start|stop|refresh}" &gt;&amp;2
                exit $SMF_EXIT_ERR_FATAL
                ;;
esac

exit $SMF_EXIT_OK
</code></pre></div></div>

<p>Make it executable and move the start-script to the correct location:</p>

<div class="language-plaintext highlighter-rouge"><div class="highlight"><pre class="highlight"><code># chmod +x transmission-daemon.sh
# mv transmission-daemon.sh /lib/svc/method/
</code></pre></div></div>

<p>Import the service:</p>

<div class="language-plaintext highlighter-rouge"><div class="highlight"><pre class="highlight"><code># svccfg import transmission-daemon.xml
# svcs transmission-daemon
# svcadm enable transmission-daemon
</code></pre></div></div>

<p>Transmission should automatically create its config files in the <code class="language-plaintext highlighter-rouge">/home/transmission</code>
folder. Edit it, then force the daemon to reload:</p>

<p>Make sure the transmission user have write right on the defined folders (UID 978, GID 100)!</p>

<div class="language-plaintext highlighter-rouge"><div class="highlight"><pre class="highlight"><code>kill -HUP &lt;Transmission process ID&gt;
</code></pre></div></div>]]></content><author><name>z</name></author><summary type="html"><![CDATA[We will use zadm for zone administration, installation is simple: # pkg install zadm We need a vnic for our zone, so let’s create an instance: # dladm create-vnic -l e1000g0 zone_transmission_0 Then set up the zone with zadm: # zadm create -b pkgsrc transmission The zone config will open in your $EDITOR, modify it like shown below: { "autoboot" : "true", "bootargs" : "", "brand" : "pkgsrc", "dns-domain" : "lan", "fs" : [ { "dir" : "/torrent", "options" : [ "rw" ], "special" : "/mnt/torrent", "type" : "lofs" } ], "fs-allowed" : "", "hostid" : "", "ip-type" : "exclusive", "limitpriv" : "default", "net" : [ { "physical" : "zone_transmission_0" } ], "pool" : "", "resolvers" : [ "10.0.0.1" ], "scheduling-class" : "", "zonename" : "transmission", "zonepath" : "/zones/transmission" } Save and close the editor, zadm will create the zone as requested: # zadm list NAME STATUS BRAND RAM CPUS SHARES global running ipkg 16G 4 1 transmission installed pkgsrc - - 1 Let’s boot our new zone: # zadm boot transmission also console into it: # zlogin transmission [Connected to zone 'transmission' pts/8] Last login: Sat Jan 11 09:01:49 2025 on pts/3 OmniOS r151052 omnios-r151052-dbe4644ba92 November 2024 root@transmission:~# Set up our networking: ipadm create-addr -T static -a 10.0.0.30/24 zone_transmission_0/v4 route -p add default 10.0.0.1 Install transmission-daemon using pkgin: # pkgin update # pkgin search transmission # pkgin in transmission Pkgin automatically created a transmission user for me with 978 UID and 100 GID. This will be important later on. Transmission gets installed in the /opt/local/bin folder. I had to modify the /etc/passwd file defining a valid home direcotry for the transmission user: transmission:x:978:100:transmission user:/home/transmission:/false Create the following files: transmission-daemon.xml : &lt;?xml version="1.0"?&gt; &lt;!DOCTYPE service_bundle SYSTEM "/usr/share/lib/xml/dtd/service_bundle.dtd.1"&gt; &lt;service_bundle type='manifest' name='export'&gt; &lt;service name='application/transmission-daemon' type='service' version='1'&gt; &lt;!-- Wait for network interfaces to be initialized. --&gt; &lt;dependency name='network' grouping='require_all' restart_on='none' type='service'&gt; &lt;service_fmri value='svc:/milestone/network:default' /&gt; &lt;/dependency&gt; &lt;!-- Wait for all local filesystems to be mounted. --&gt; &lt;dependency name='filesystem' grouping='require_all' restart_on='none' type='service'&gt; &lt;service_fmri value='svc:/system/filesystem/local' /&gt; &lt;/dependency&gt; &lt;exec_method type='method' name='start' exec='/lib/svc/method/transmission-daemon.sh start' timeout_seconds='60' /&gt; &lt;exec_method type='method' name='stop' exec=':kill -9' timeout_seconds='60' /&gt; &lt;!-- Both action_authorization and value_authorization are needed to allow the framework general/enabled property to be changed when performing action (enable, disable, etc) on the service. --&gt; &lt;property_group name='general' type='framework'&gt; &lt;propval name='value_authorization' type='astring' value='solaris.smf.value.transmission' /&gt; &lt;propval name='action_authorization' type='astring' value='solaris.smf.manage.transmission' /&gt; &lt;/property_group&gt; &lt;property_group name='startd' type='framework'&gt; &lt;!-- sub-process core dumps shouldn't restart session --&gt; &lt;propval name='ignore_error' type='astring' value='core,signal' /&gt; &lt;/property_group&gt; &lt;instance name='default' enabled='false'&gt; &lt;method_context&gt; &lt;method_credential user='transmission' group='transmission' /&gt; &lt;/method_context&gt; &lt;/instance&gt; &lt;stability value='Evolving' /&gt; &lt;template&gt; &lt;common_name&gt; &lt;loctext xml:lang='C'&gt; Transmission BitTorrent Client (Daemon) &lt;/loctext&gt; &lt;/common_name&gt; &lt;/template&gt; &lt;/service&gt; &lt;/service_bundle&gt; transmission-daemon.sh : #!/bin/sh . /lib/svc/share/smf_include.sh # ----- *ADVANCED* CONFIGURATION ----- # Only change these options if you know what you are doing! # # The folder where Transmission stores the config &amp; web files. # ONLY change this you have it at a non-default location TRANSMISSION_HOME="/home/transmission" TRANSMISSION_WEB_HOME="/opt/local/share/transmission/public_html" # # The arguments passed on to transmission-daemon. # ONLY change this you need to, otherwise use the # settings file as per above. TRANSMISSION_ARGS=" -c /torrent/torrent_file " # ----- END OF CONFIGURATION ----- PATH=/opt/local/bin:/usr/local/sbin:/usr/local/bin:/usr/sbin:/usr/bin:/sbin:/bin NAME=transmission-daemon DAEMON=`which ${NAME}` # Exit if the package is not installed [ -x "${DAEMON}" ] || exit $SMF_EXIT_ERR_FATAL # # Function that starts the daemon/service # do_start() { # Export the configuration/web directory, if set if [ -n "$TRANSMISSION_HOME" ]; then export TRANSMISSION_HOME fi if [ -n "$TRANSMISSION_WEB_HOME" ]; then export TRANSMISSION_WEB_HOME fi ${DAEMON} ${TRANSMISSION_ARGS} } # # Function that stops the daemon/service # do_stop() { pkill -9 ${NAME} } case "$1" in start) do_start ;; stop) do_stop ;; refresh) do_stop do_start ;; *) echo "Usage: ${0} {start|stop|refresh}" &gt;&amp;2 exit $SMF_EXIT_ERR_FATAL ;; esac exit $SMF_EXIT_OK Make it executable and move the start-script to the correct location: # chmod +x transmission-daemon.sh # mv transmission-daemon.sh /lib/svc/method/ Import the service: # svccfg import transmission-daemon.xml # svcs transmission-daemon # svcadm enable transmission-daemon Transmission should automatically create its config files in the /home/transmission folder. Edit it, then force the daemon to reload: Make sure the transmission user have write right on the defined folders (UID 978, GID 100)! kill -HUP &lt;Transmission process ID&gt;]]></summary></entry><entry><title type="html">Pushover notification for Transmission</title><link href="http://extrowerk.com/2025-01-08/Transmission-Pushover-Notification.html" rel="alternate" type="text/html" title="Pushover notification for Transmission" /><published>2025-01-08T01:01:00+01:00</published><updated>2025-01-08T01:01:00+01:00</updated><id>http://extrowerk.com/2025-01-08/Transmission-Pushover-Notification</id><content type="html" xml:base="http://extrowerk.com/2025-01-08/Transmission-Pushover-Notification.html"><![CDATA[<p><img src="/img/2025-01-08_pushover.jpg" alt="Pushover" /></p>

<p>I have transmission-damemon running headlessly on my NAS server and I have set up a Pushover notification for the completed downloads:</p>

<!--more-->

<div class="language-plaintext highlighter-rouge"><div class="highlight"><pre class="highlight"><code>#!/bin/sh

TOKEN="Secret_Token"
USER="Unique_User_ID"

/usr/local/bin/curl -s \
 --form-string "user=$USER" \
 --form-string "token=$TOKEN" \
 --form-string "message=Kesz: $TR_TORRENT_NAME" \
 https://api.pushover.net/1/messages.json
</code></pre></div></div>

<p>You can enable this script adding the following line to <code class="language-plaintext highlighter-rouge">settings.json</code>:</p>

<div class="language-plaintext highlighter-rouge"><div class="highlight"><pre class="highlight"><code>    "script-torrent-done-enabled": true,
    "script-torrent-done-filename": "/usr/local/etc/transmission/home/bin/pushover.sh",
</code></pre></div></div>

<p>I also use Pushover for the smartmontools daily checks, but instead of using sophisticated scripts like above I have used the relay eamil address provided by the Pushover service. It works great and helped me to detect a usb cable issue.</p>]]></content><author><name>z</name></author><summary type="html"><![CDATA[I have transmission-damemon running headlessly on my NAS server and I have set up a Pushover notification for the completed downloads:]]></summary></entry><entry><title type="html">Basics of Forth, pt. 2</title><link href="http://extrowerk.com/2025-01-06/Forth_Basics_2.html" rel="alternate" type="text/html" title="Basics of Forth, pt. 2" /><published>2025-01-06T01:01:00+01:00</published><updated>2025-01-06T01:01:00+01:00</updated><id>http://extrowerk.com/2025-01-06/Forth_Basics_2</id><content type="html" xml:base="http://extrowerk.com/2025-01-06/Forth_Basics_2.html"><![CDATA[<p><img src="/img/2025-01-06_pcb.jpg" alt="PCB" /></p>

<p>Write a program that takes an integer, calculates the square and prints the result on the screen also print out a newline character \n after the result.</p>

<div class="language-plaintext highlighter-rouge"><div class="highlight"><pre class="highlight"><code>: square-calc ( n -- n*n )
	depth 1 &lt; 
	if
		." Supply an integer and call square-calc again. "
	else
		." The square of the number you entered is "
		dup * . cr
	then ;
</code></pre></div></div>

<hr />

<p>Write a program that first asks the user for an integer and after that, a floating-point number. Finally, the program prints both numbers on the screen. The floating-point number shall be printed with two decimal places of precision.</p>

<div class="language-plaintext highlighter-rouge"><div class="highlight"><pre class="highlight"><code>: int-float-print ( n n -- )
	depth 2 &lt; 
	if
		." Supply an integer and a float then call int-float-print again. "
	else
		." You entered the decimal number, rounded to two decimal places: "
		2 (f.n)
		cr
		." You entered the integer: "
		.
		cr
	then ;
</code></pre></div></div>

<hr />

<p>Write a program that prompts the user for an amount in Finnish markka and converts it to euro. Finally, the program prints the amount on the screen in euro with two decimal places of precision. The euro conversion factor is 5.94573.</p>

<div class="language-plaintext highlighter-rouge"><div class="highlight"><pre class="highlight"><code>: FIM-to-EUR ( n -- m )
	depth 1 &lt; 
	if
		." Supply the amount of FIM to convert to EUR "
	else
		." FIM converted to euro: "
		5,94573
		f/
		2 (f.n)
		cr
	then ;

</code></pre></div></div>

<hr />

<p>Write a program that prompts the user for two integers and prints the sum, difference and product of the numbers on the screen.</p>

<div class="language-plaintext highlighter-rouge"><div class="highlight"><pre class="highlight"><code>: sum-dif-prod ( n m -- p q r )
	depth 2 &lt; 
	if
		." Supply 2 integer "
	else
		over over over over
		cr
		." Sum : " + . 
		cr
		." Diff : " - . 
		cr
		." Prod : " * . 
		cr
	then ;
</code></pre></div></div>]]></content><author><name>z</name></author><summary type="html"><![CDATA[Write a program that takes an integer, calculates the square and prints the result on the screen also print out a newline character \n after the result. : square-calc ( n -- n*n ) depth 1 &lt; if ." Supply an integer and call square-calc again. " else ." The square of the number you entered is " dup * . cr then ; Write a program that first asks the user for an integer and after that, a floating-point number. Finally, the program prints both numbers on the screen. The floating-point number shall be printed with two decimal places of precision. : int-float-print ( n n -- ) depth 2 &lt; if ." Supply an integer and a float then call int-float-print again. " else ." You entered the decimal number, rounded to two decimal places: " 2 (f.n) cr ." You entered the integer: " . cr then ; Write a program that prompts the user for an amount in Finnish markka and converts it to euro. Finally, the program prints the amount on the screen in euro with two decimal places of precision. The euro conversion factor is 5.94573. : FIM-to-EUR ( n -- m ) depth 1 &lt; if ." Supply the amount of FIM to convert to EUR " else ." FIM converted to euro: " 5,94573 f/ 2 (f.n) cr then ; Write a program that prompts the user for two integers and prints the sum, difference and product of the numbers on the screen. : sum-dif-prod ( n m -- p q r ) depth 2 &lt; if ." Supply 2 integer " else over over over over cr ." Sum : " + . cr ." Diff : " - . cr ." Prod : " * . cr then ;]]></summary></entry><entry><title type="html">Prebuilt bootloaders</title><link href="http://extrowerk.com/2024-12-30/SBC-Bootloaders.html" rel="alternate" type="text/html" title="Prebuilt bootloaders" /><published>2024-12-30T01:01:00+01:00</published><updated>2024-12-30T01:01:00+01:00</updated><id>http://extrowerk.com/2024-12-30/SBC-Bootloaders</id><content type="html" xml:base="http://extrowerk.com/2024-12-30/SBC-Bootloaders.html"><![CDATA[<p><img src="/img/2024-12-30_pcb.jpg" alt="PCB" /></p>

<hr />

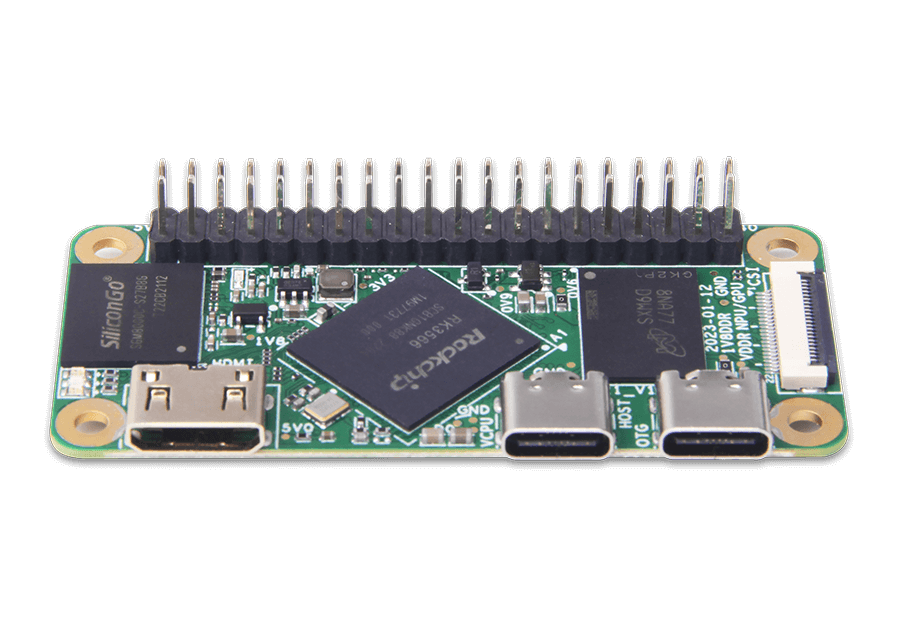
<p>I have built the latest U-boot (2025.01-rc5) for Radxa Zero 3 (both W and E version supported): <a href="https://extrowerk.com/storage/bootloader/">Bootloader storage</a>
Note: you have to extract the downloaded file first.</p>

<p>How are they built?</p>

<div class="language-plaintext highlighter-rouge"><div class="highlight"><pre class="highlight"><code>#!/bin/sh
UB_TREE_PATH="/u-boot/u-boot-2025.01-rc5"
cd $UB_TREE_PATH

# rkbin: https://github.com/rockchip-linux/rkbin
RKBIN="/rkbin/bin/rk35/"
export BL31="$RKBIN/rk3568_bl31_v1.44.elf"
export ROCKCHIP_TPL="$RKBIN/rk3566_ddr_1056MHz_v1.23.bin"

gmake CROSS_COMPILE=aarch64-none-elf- distclean
gmake CROSS_COMPILE=aarch64-none-elf- radxa-zero-3-rk3566_defconfig
gmake CROSS_COMPILE=aarch64-none-elf-

</code></pre></div></div>

<p>Most guide explains how to prepare an sd-card with both the OpenBSD installer image and U-boot, but I think it is unnecessary complexity. Instead of this, I would recommend to use an SD-card with U-boot installed like:</p>

<div class="language-plaintext highlighter-rouge"><div class="highlight"><pre class="highlight"><code>dd if=u-boot-rockchip.bin of=/dev/sdXc seek=64
</code></pre></div></div>

<p>Then take the arm64 version of the OpenBSD installer76.img and write it to a separate USB-disk like:</p>

<div class="language-plaintext highlighter-rouge"><div class="highlight"><pre class="highlight"><code>dd if=install76.img of=/dev/rsdXc bs=1m
</code></pre></div></div>

<p>Insert the SD-card int the slot on the SBC, then connect the USB disk to the SBC via a USB-C OTG cable and let it boot.
Examine the output via serial console (use the UART-1 pins).</p>]]></content><author><name>z</name></author><summary type="html"><![CDATA[I have built the latest U-boot (2025.01-rc5) for Radxa Zero 3 (both W and E version supported): Bootloader storage Note: you have to extract the downloaded file first. How are they built? #!/bin/sh UB_TREE_PATH="/u-boot/u-boot-2025.01-rc5" cd $UB_TREE_PATH # rkbin: https://github.com/rockchip-linux/rkbin RKBIN="/rkbin/bin/rk35/" export BL31="$RKBIN/rk3568_bl31_v1.44.elf" export ROCKCHIP_TPL="$RKBIN/rk3566_ddr_1056MHz_v1.23.bin" gmake CROSS_COMPILE=aarch64-none-elf- distclean gmake CROSS_COMPILE=aarch64-none-elf- radxa-zero-3-rk3566_defconfig gmake CROSS_COMPILE=aarch64-none-elf- Most guide explains how to prepare an sd-card with both the OpenBSD installer image and U-boot, but I think it is unnecessary complexity. Instead of this, I would recommend to use an SD-card with U-boot installed like: dd if=u-boot-rockchip.bin of=/dev/sdXc seek=64 Then take the arm64 version of the OpenBSD installer76.img and write it to a separate USB-disk like: dd if=install76.img of=/dev/rsdXc bs=1m Insert the SD-card int the slot on the SBC, then connect the USB disk to the SBC via a USB-C OTG cable and let it boot. Examine the output via serial console (use the UART-1 pins).]]></summary></entry></feed>